You can use the Python source node to run a Python script that will generated table outputs than can then be connected directly to a target node, or to tables from another source to create a data mashup.
There are a few ways to construct your Python script: they can be downloaded from the Pyramid Marketplace, imported from the Pyramid content manager, or written or pasted directly into the Python node's Properties panel.
Configure the Python Source
Add the Python source node to the data from and then go to its Properties panel to configure the script.
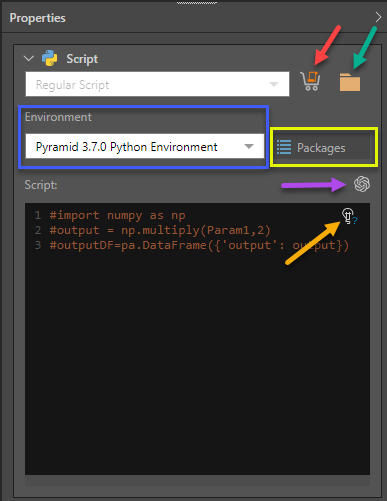
Script
There are four ways in which you can provide the Python script:
- Generate Your Script: get an AI-generated Python script based on a given prompt (purple arrow above).
- Marketplace: download a script from the Pyramid Marketplace (red arrow above). Once downloaded, the script will appear in the script window.
- Pick a Script: open the content manager folder tree to select a script that was built and saved in Pyramid (green arrow above). Once the script is selected, it will appear in the script window.
- Write or Paste a Script: write or paste a script directly into the script window.
Use AI to Generate a Script
Pyramid's Generative AI integration lets you use AI to generate Python statements. This is useful if you want to generate code quickly, or don't know the syntax, for instance. To do this, click the Gen AI icon from the Properties panel. In the text field at the top of the Generate Your Python dialog, enter a description of the query you want to perform.
The dialog for generating your script contains the following fields and buttons:
- Text Field: enter a description of the query you want to perform and click the arrow to enter your query description and return a it as a script.
- Script Window: the AI-generated script will appear in the scripting window.
- Explain Code: open an AI-generated explanation of the script that was returned in the scripting window.
- Apply: apply the script to the Query node.
- Cancel: close the dialog without applying any changes.
Explain Code
![]() Use the Explain Script function to produce an AI-generated explanation of what the script does (note this is available even if the script was not itself AI-generated). Note: Each time you click the Explain Script button, a new explanation is generated. For more information, see Explain Script.
Use the Explain Script function to produce an AI-generated explanation of what the script does (note this is available even if the script was not itself AI-generated). Note: Each time you click the Explain Script button, a new explanation is generated. For more information, see Explain Script.
This explanation can be copied, and then pasted to the "Description" field, for instance.
Warning: AI-generated assets are generated from public domain algorithms, which can produce both erroneous and inconsistent or random results. Use at your own risk.
Environment
Choose the virtual Python environment (blue highlight above) that uses the required Python version and packages.
Pyramid enables Admins to create multiple virtual environments, where each of these environments can use a different Python version and different 3rd party packages.
Packages
View the list of packages that have been downloaded to the currently selected virtual Python environment (yellow highlight above).
- Click here to learn more about virtual scripting environments.
Configure the Output
The Output window displays the output of the current script. Each row in the listing represents a column:
- Data Frame: the data frame of the column.
- Column Name: the name of the column.
- Type: the data type of the columns.
- Size: the size of the column
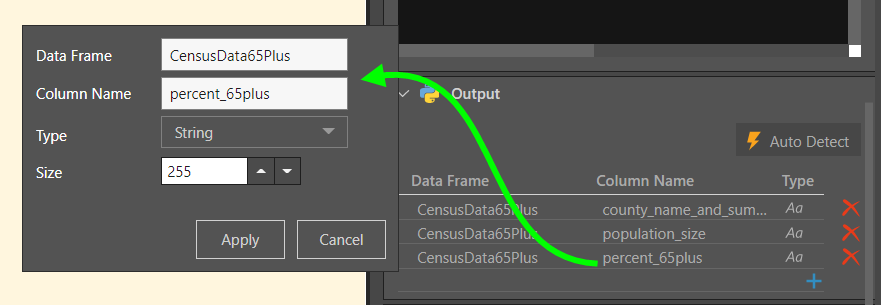
To edit a column output, click on it to open its fly-out menu (green arrow below). To delete a column, click its delete icon, and to add a column, click the plus icon.
Data Frame
When downloading a Marketplace script, Pyramid detects the output automatically. When writing your own script, or selecting a shared script, users must manually add the output columns to the Output window.
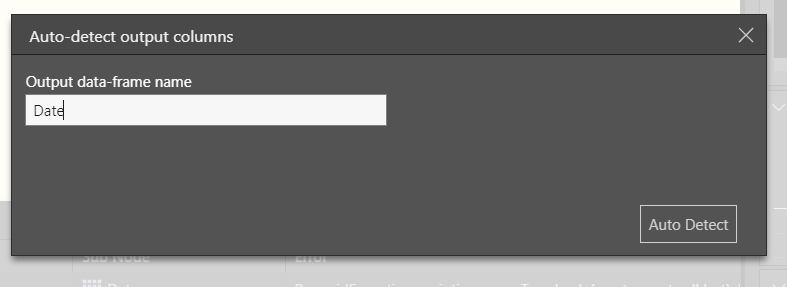
Auto Detect
Click 'Auto Detect' from the Output window to open the 'Auto-detect output columns' dialog, where you can enter the data frame. Pyramid will then detect the given data frame and its columns in the script, and add them to the output list.
- Click here to learn more about data frame support.
Add Columns
To add columns to the output list manually, click the plus icon (green arrow below). You need to specify the data frame, column name, and data type.
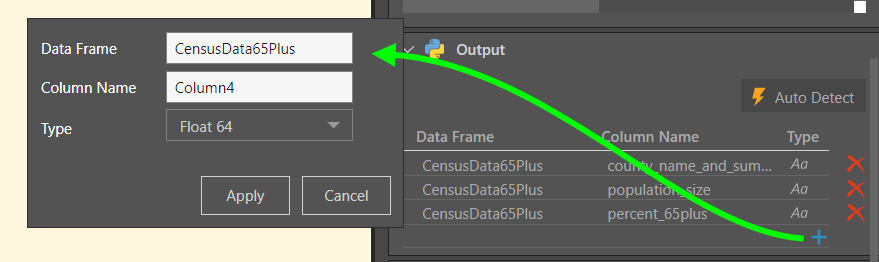
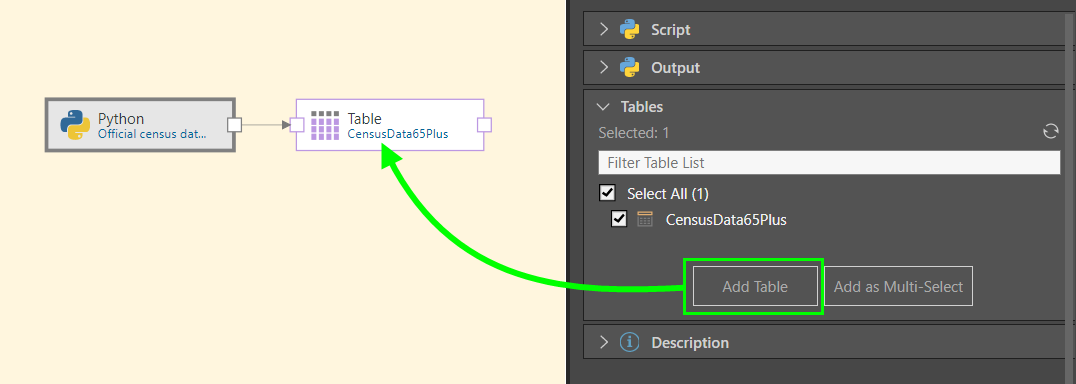
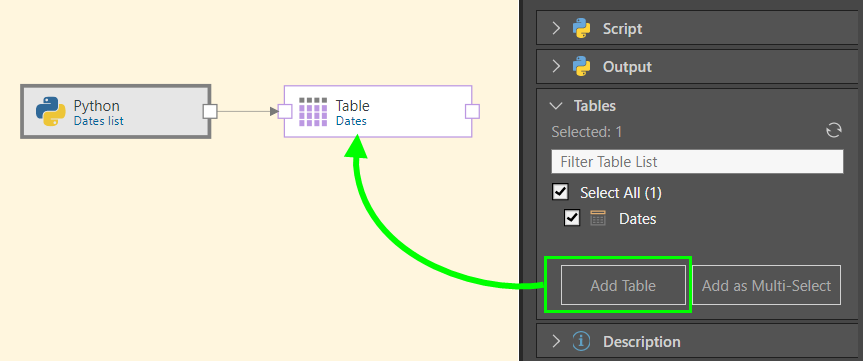
Table Selection
Go to the Tables window (image below) to choose which tables to copy into the new data model. Table selection is relevant for both direct querying and data ingestion. Select the tables to copy, and then select 'Add Tables' to assign each table to an individual node, or select 'Add as Multi-Select' to copy all tables to a single node using the multi-select function.
- Click here to learn more about the Select functions.
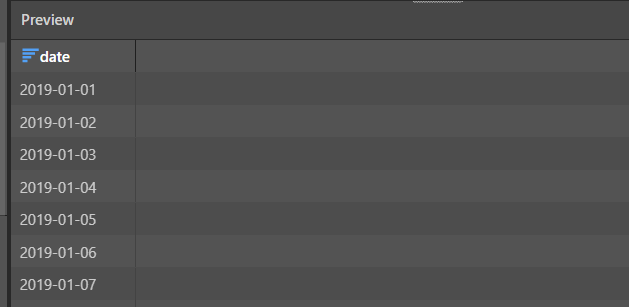
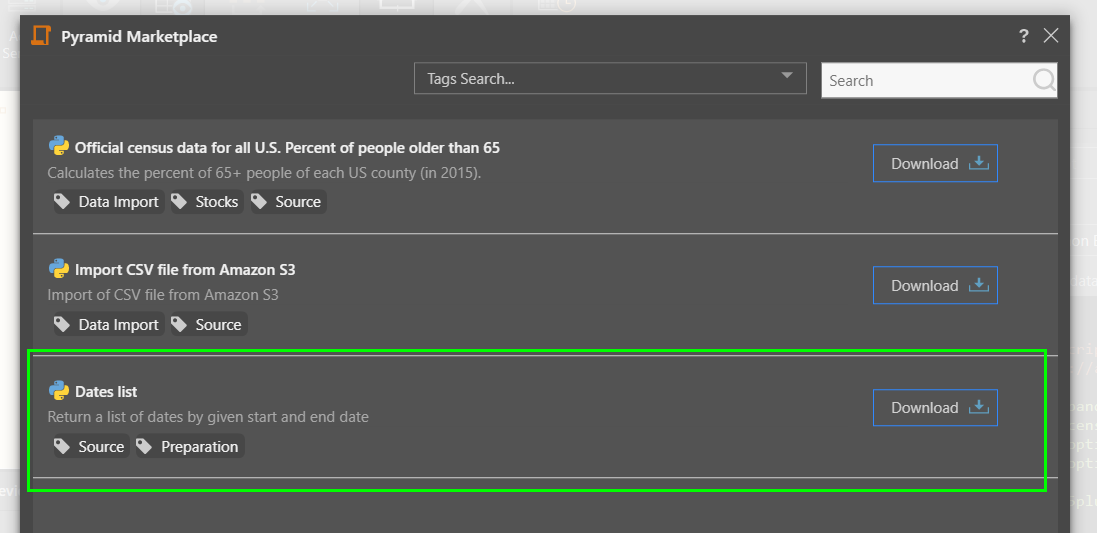
In this example, the Dates List script is downloaded from the Pyramid Marketplace to create a list of dates.
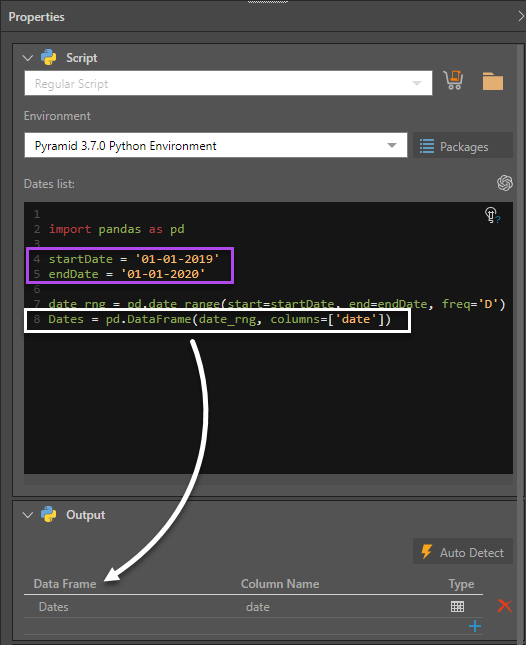
As soon as the script is downloaded, it's added to the script window. We can see here the start and end date (purple highlight below), and the data frame and column name (white highlight), which correspond to the output listing:
Next, the new Dates table was connected to the source node by clicking the Add Table button:
When the new Dates table is previewed, we see the list of dates that was generated by the script: